Was this page helpful?
How to setup Azure AD
The following content may be useful if you're using Azure AD as a SAML Identity Provider.
To integrate Azure AD (Identity Provider) with SonarQube (Service Provider), both sides need to be configured.
For SonarQube, navigate to Administration > Authentication > SAML. For Azure AD, login to Azure and navigate to Azure AD.
Set up the SonarQube application in Azure AD
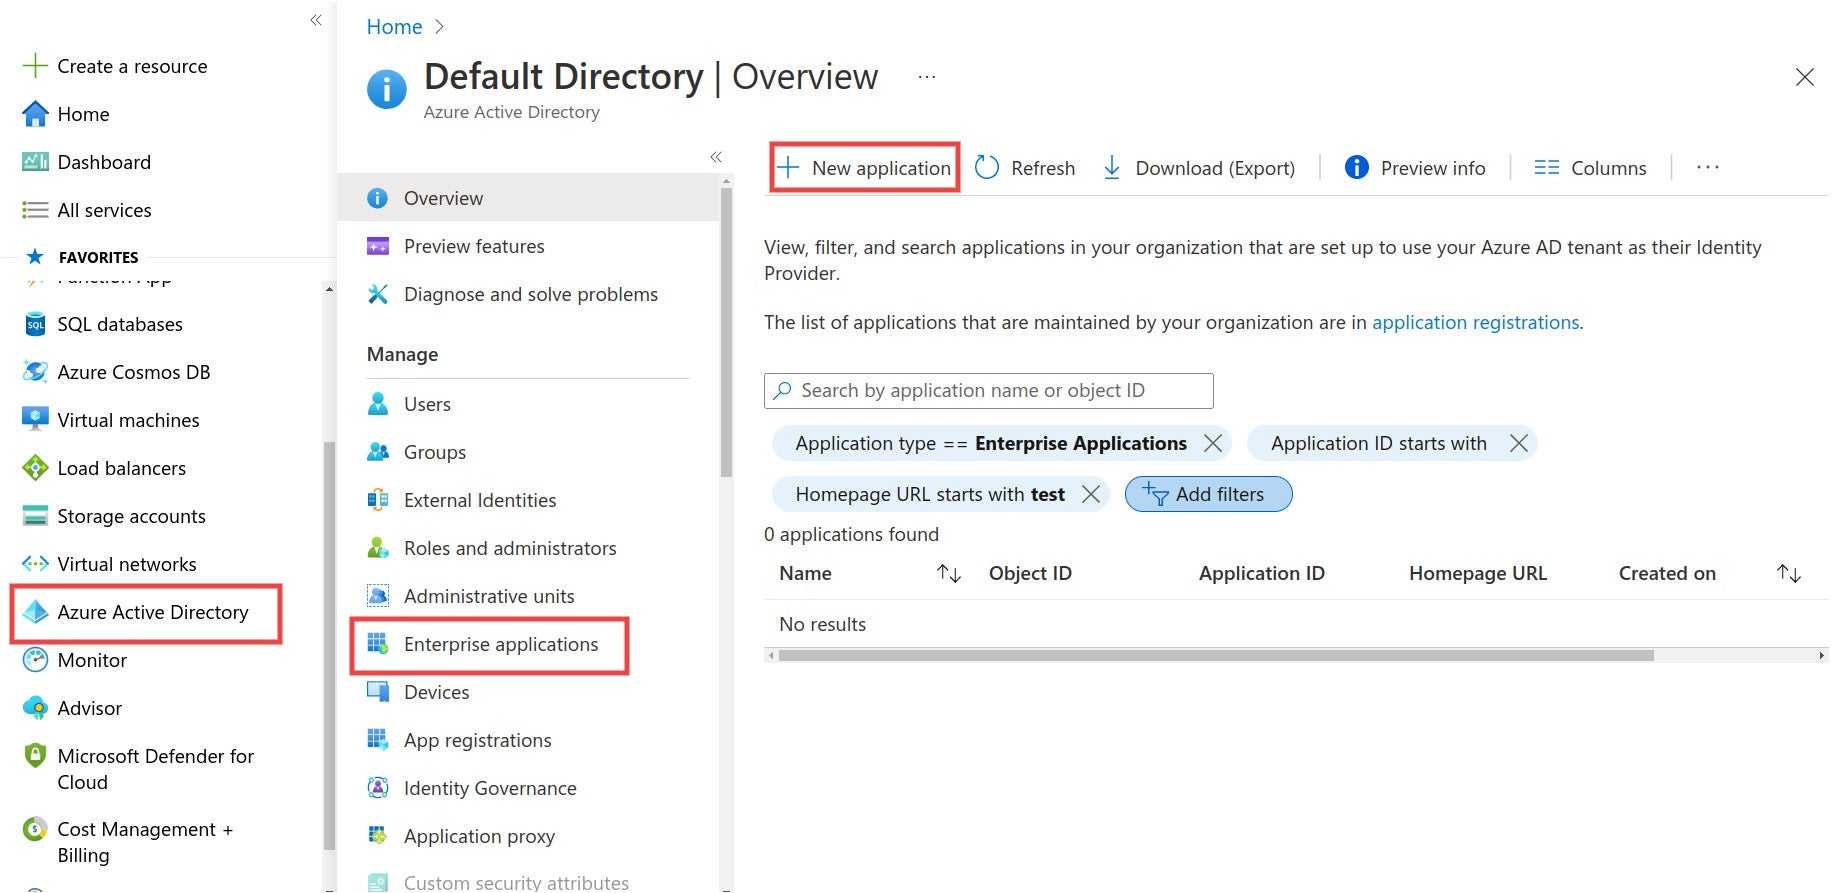
Step 1: In Azure AD, navigate to Enterprise applications and add a New Application.

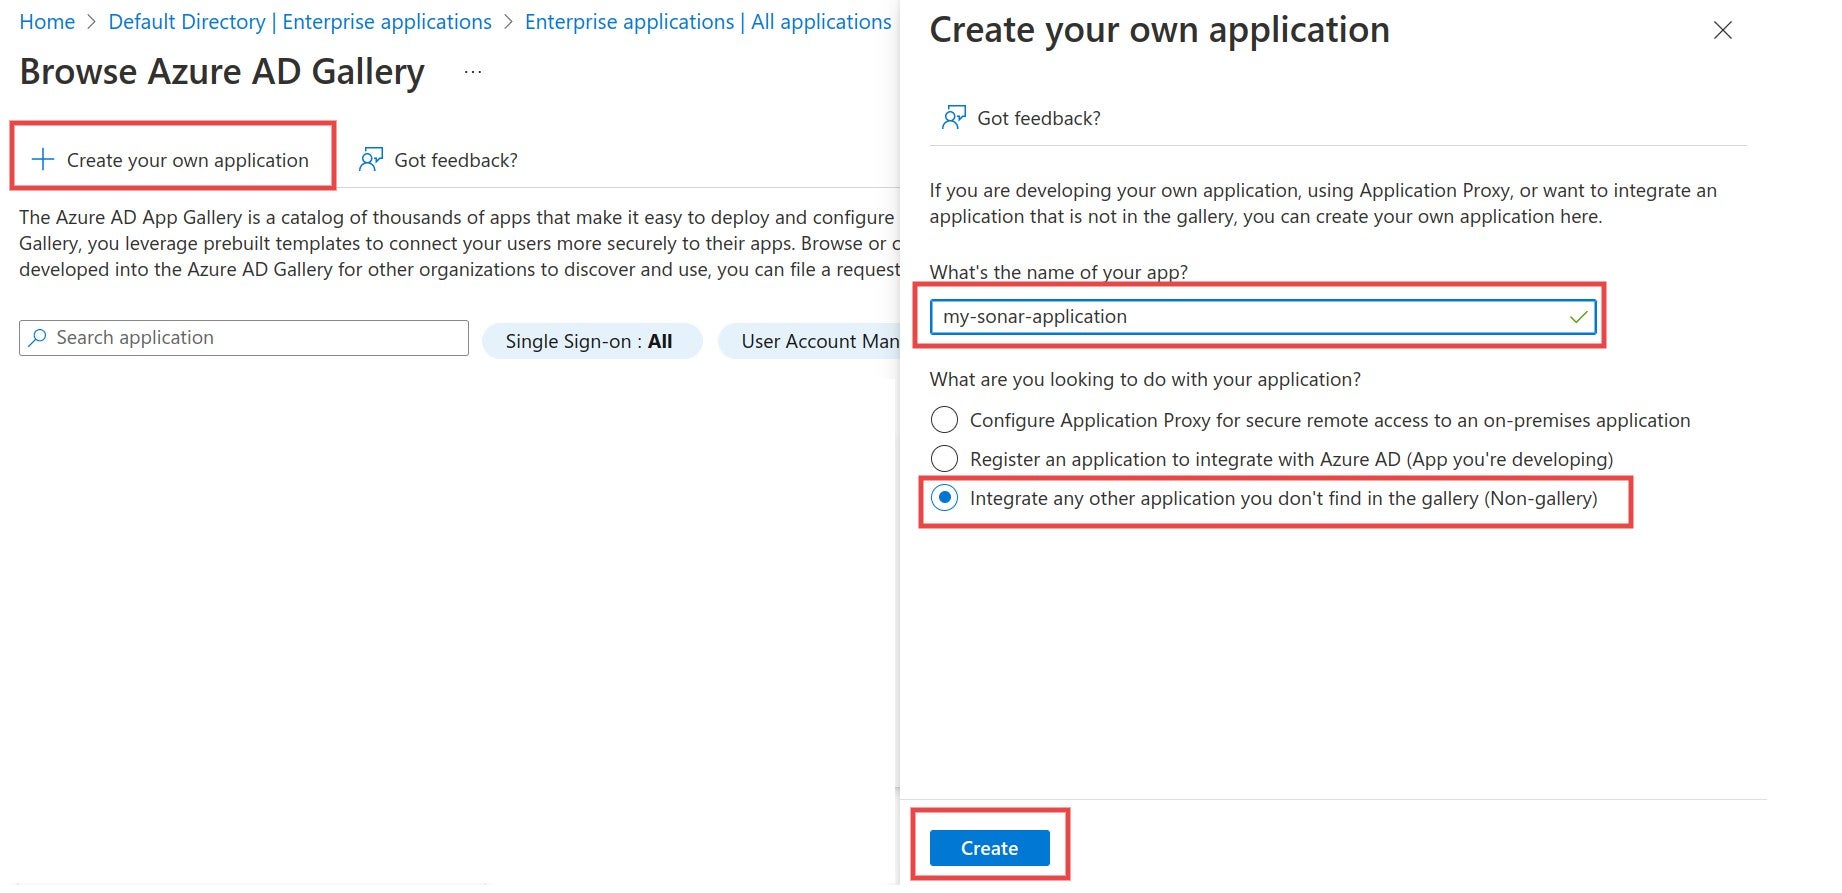
Step 2: Create your own application and fill in the name.
Link SonarQube with Azure AD
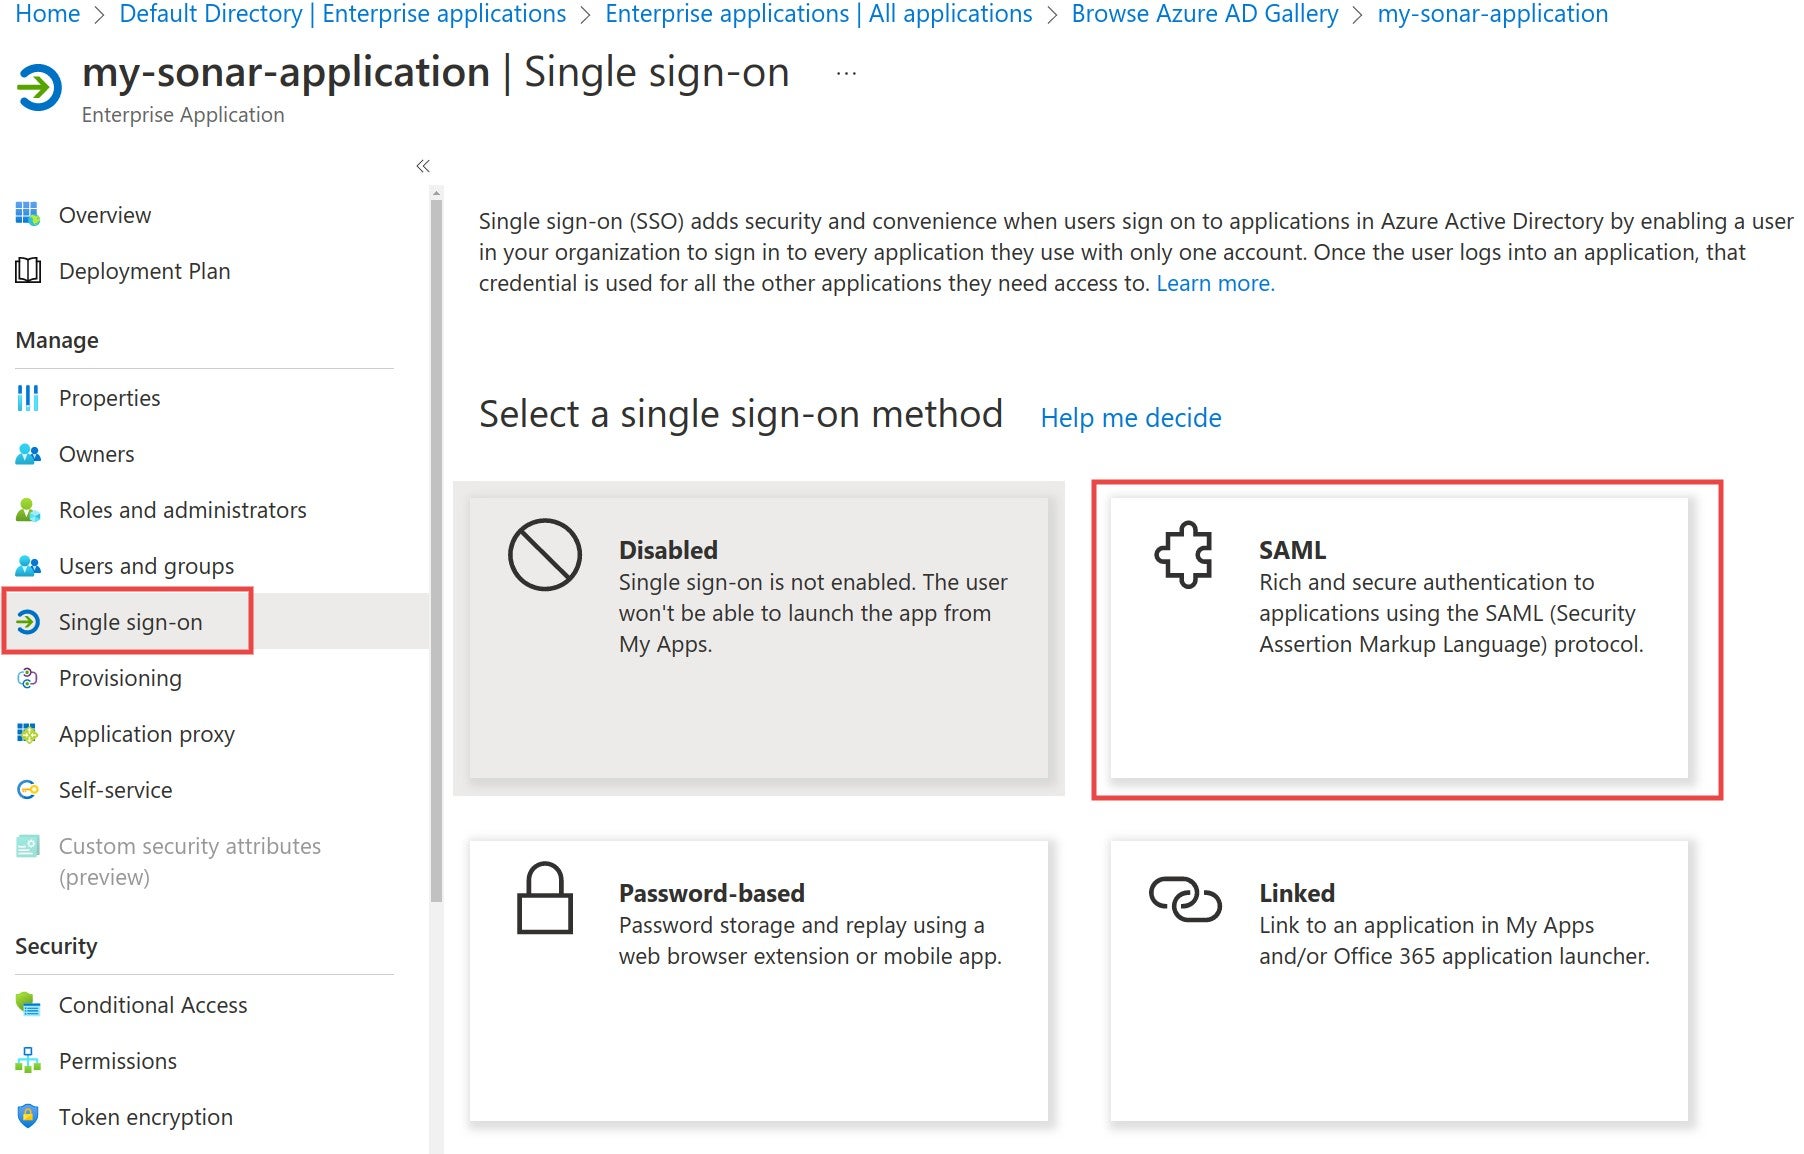
Step 1: Navigate to Single sign-on and select SAML.

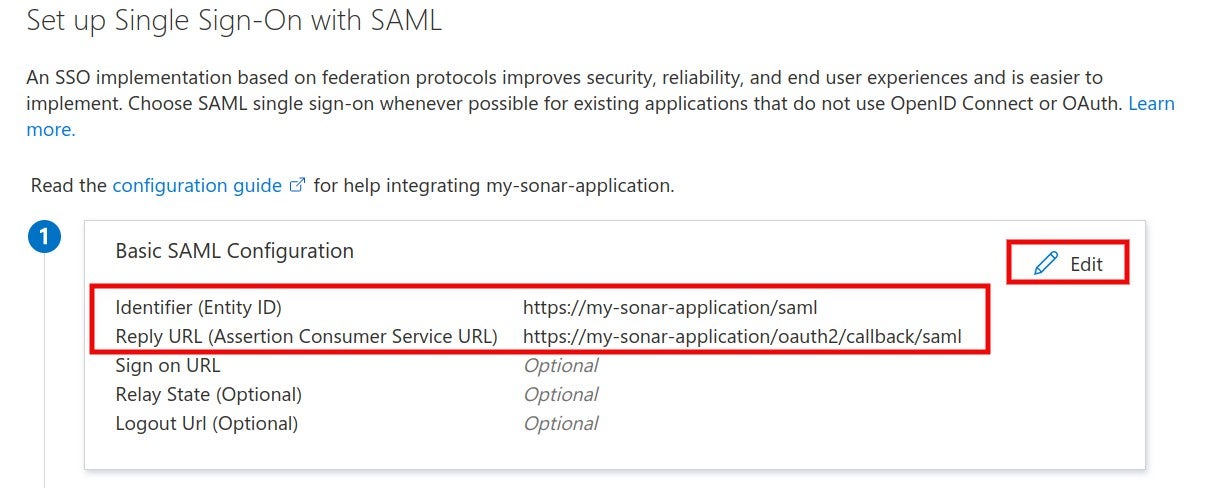
Step 2: Edit the Basic SAML Configuration and fill in the Identifier and the Reply URL fields. The Identifier has to be the same as the Application ID in SonarQube. The Reply URL must have the format <Your SonarQube URL>/oauth2/callback/saml. The Reply URL uses the Server base URL provided in SonarQube under Administration > General.

Step 3: Make sure that the Application ID in SonarQube has the same value as the Identifier in the Identity Provider.


Step 4: In the Azure AD SAML configuration, navigate to Set up and copy the Login URL and Azure AD Identifier.

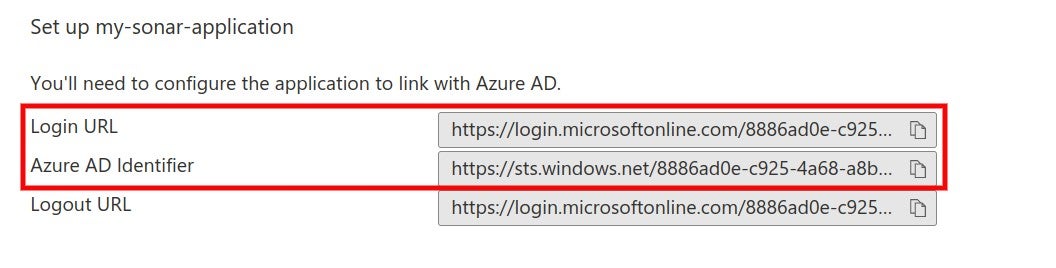
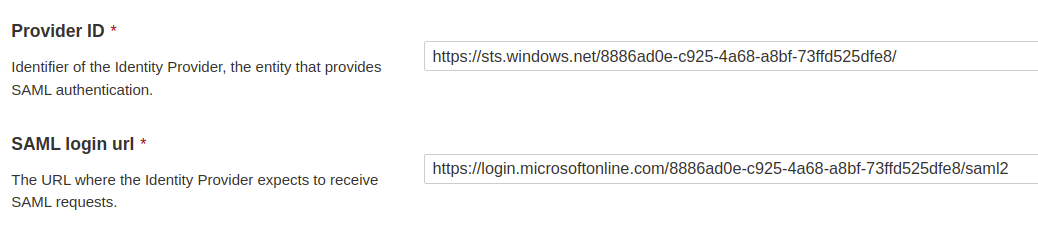
Step 5: Paste the Login URL into the SAML login url and the Azure AD Identifier into the Provider ID field in the SonarQube SAML configuration.

Attributes and claims
Step 1: In the Azure AD SAML configuration, edit Attributes & Claims to view, edit or add attributes.

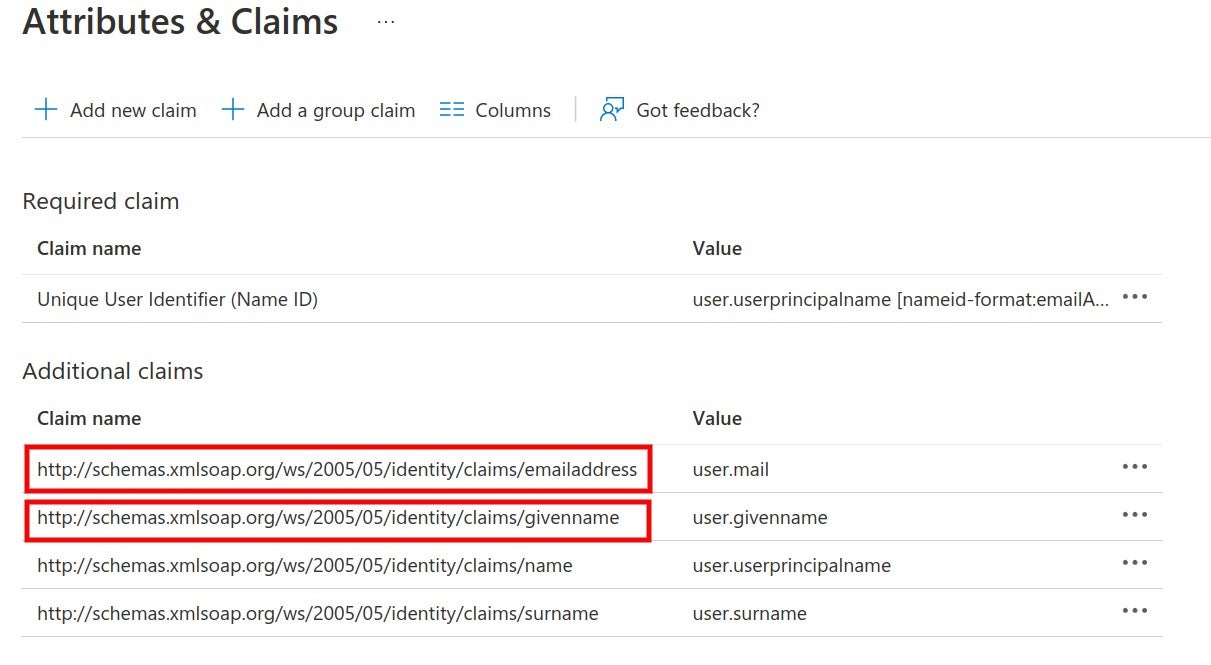
SonarQube uses the following attributes:
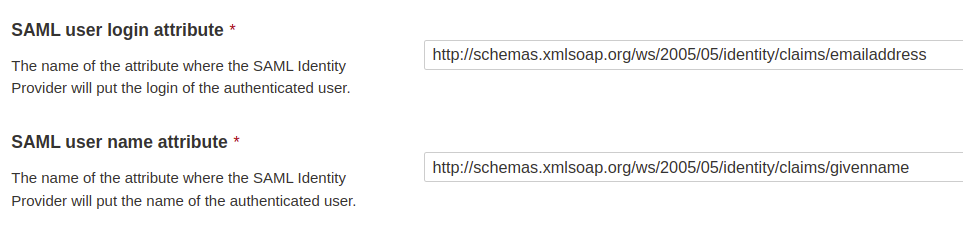
- Login (required) A unique name to identify the user in SonarQube. The default Azure AD attribute
emailaddressis used in the example. - Name (required) The full name of the user. The default Azure AD attribute
givennameis used in the example. - Email (optional) The email of the user.
- Group (optional) Supports mapping to group names in SonarQube. Group name passed by Azure AD and the group name in SonarQube should match. Otherwise, the default sonar-users group is assigned.
The NameID attribute is not used in SonarQube.
Step 2: Corresponding configuration in SonarQube. The namespace + name of the attribute should be used, as defined in Azure AD.

Certificates and signatures
Step 1: Navigate to SAML Certificates and download Certificate (Base64).

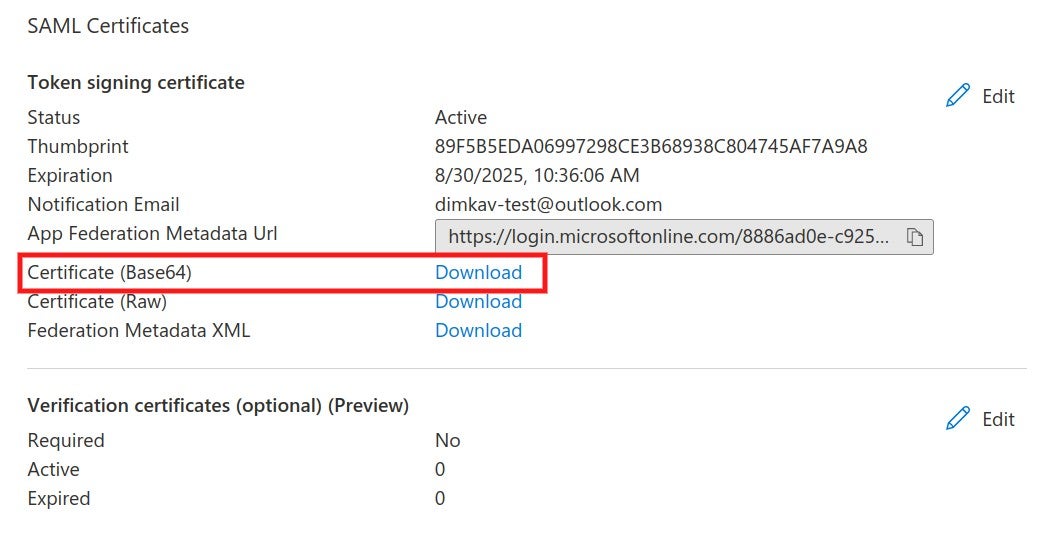
Step 2: The certificate should be copied into the Identity provider certificate field in the SonarQube SAML configuration.
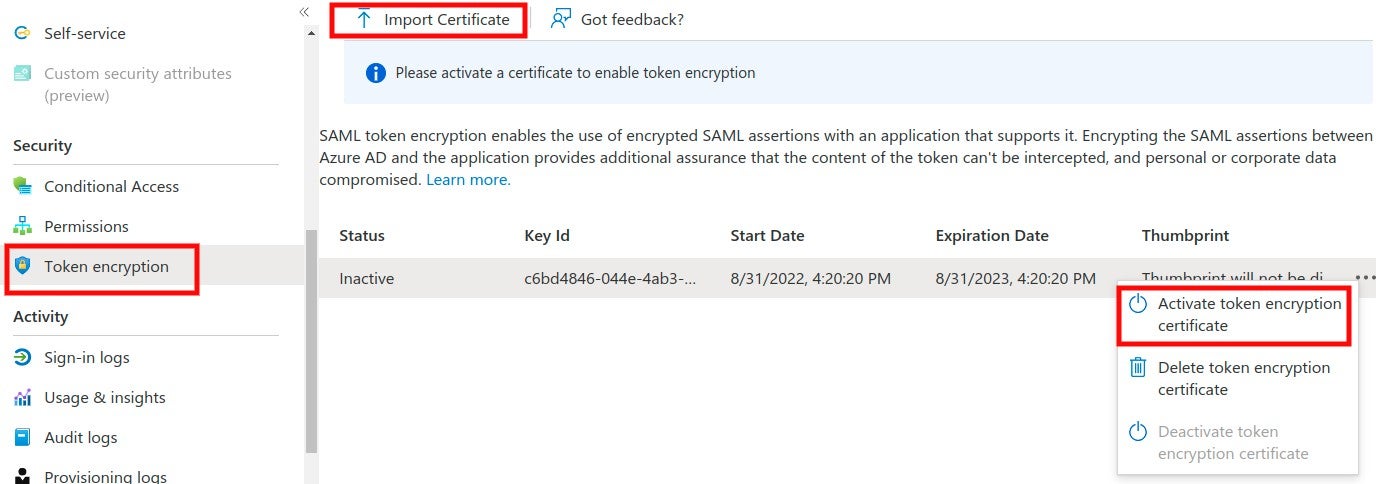
Step 3 (Optional): Encryption for SonarQube requests can be activated by generating an asymmetric key pair. (For more information, see SAML token encryption in Azure) Add the private key in SonarQube.


Import the public key certificate (.cer) file in Azure AD and activate token encryption.

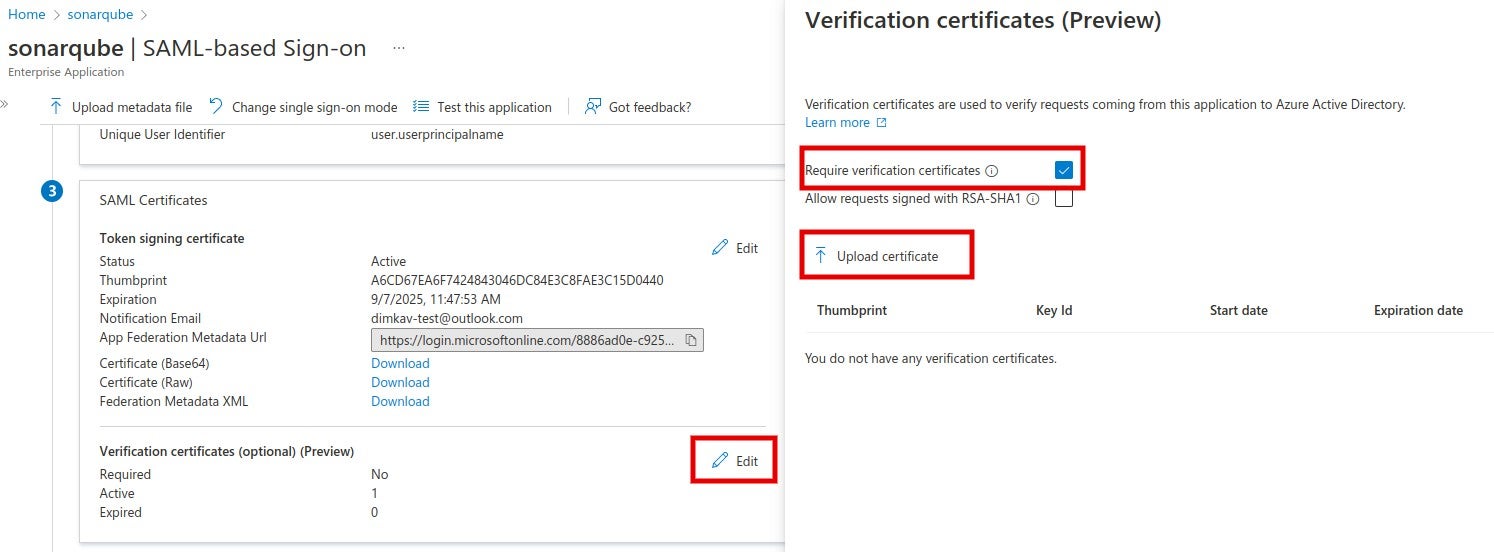
Step 4 (Optional): Azure AD supports signed SAML requests from the Service Provider (under Preview). Edit the Verification certificates, upload a certificate, and enable the Require verification certificates option.

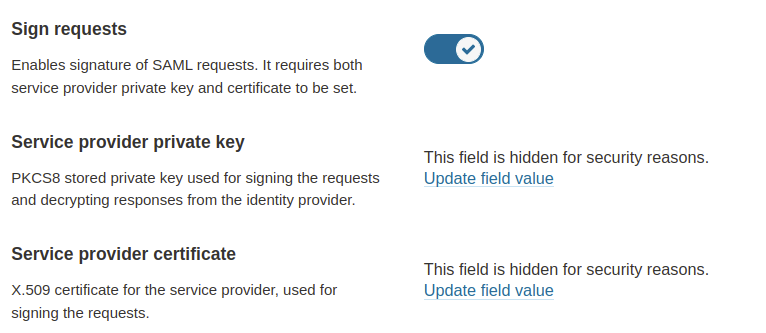
In SonarQube, fill in the corresponding private key and the same certificate and enable the Sign requests option.

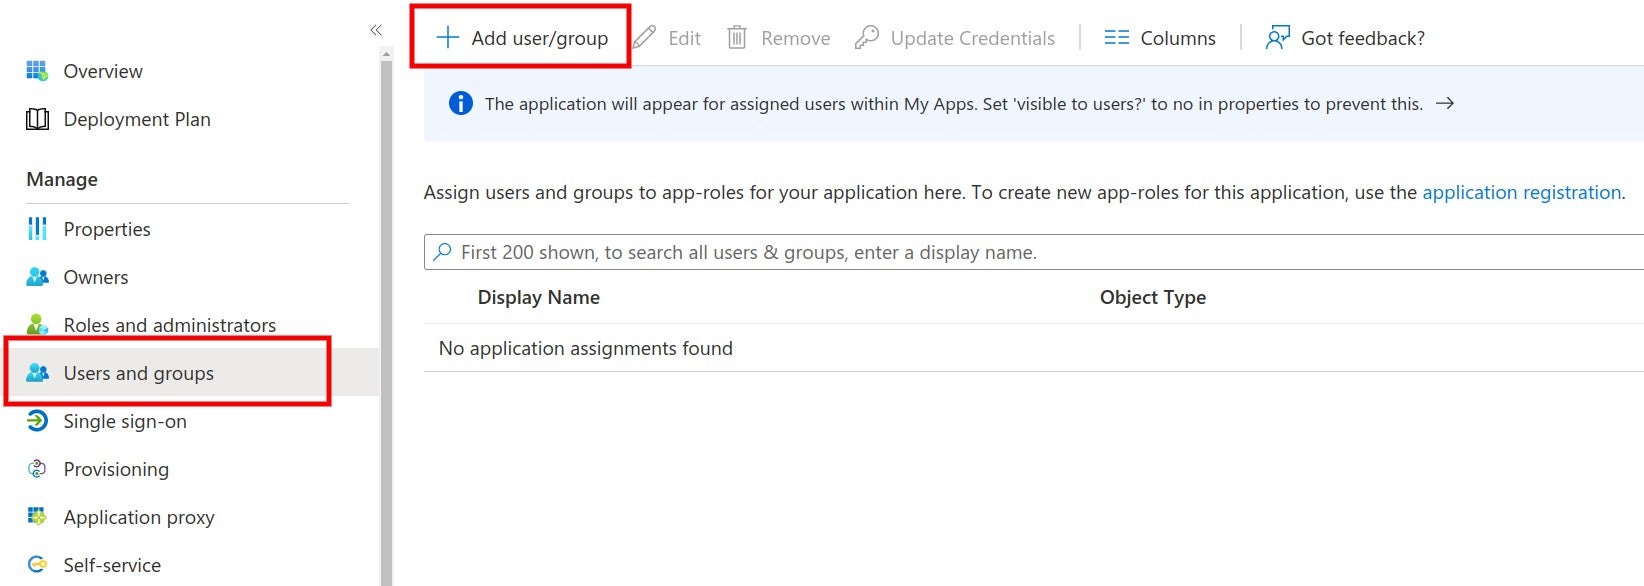
Users and groups
Step 1: In the Azure AD SonarQube application, navigate to Users and groups and assign users or groups to the application.

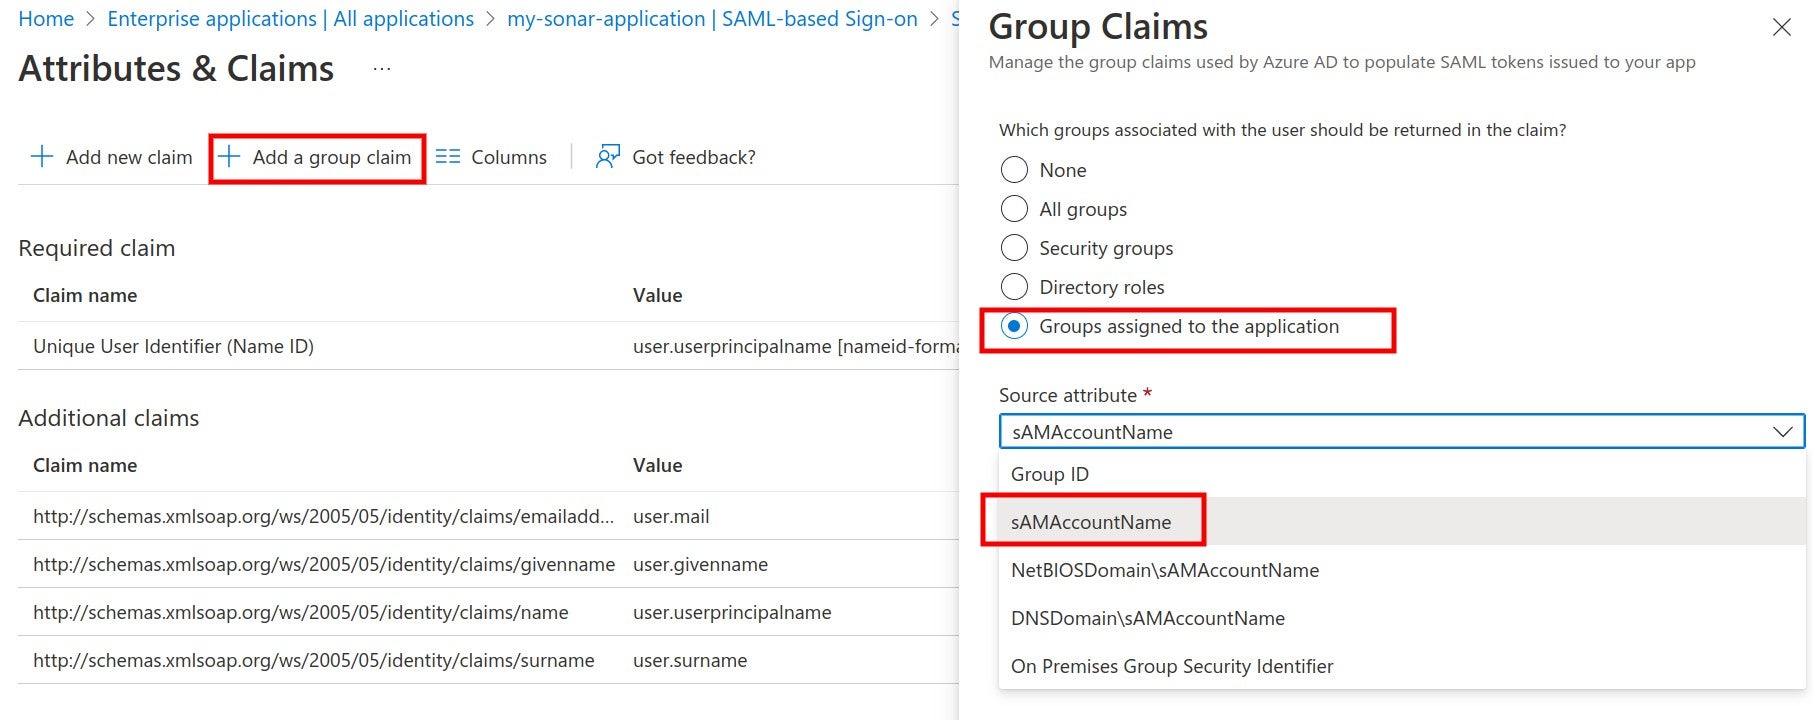
Group mapping
Group mapping between Azure AD and SonarQube can be achieved either by using the Azure AD roles or the Azure AD groups. For either case, the corresponding group name should exist in SonarQube under Administration > Security > Groups. (For more information, see Authorization)
- For mapping with the Azure AD groups, a group claim must be added with
sAMAccountNameas a source attribute.
According to Azure, this source attribute only works for groups synchronized from an on-premises Active Directory using AAD Connect Sync 1.2.70.0 or above.


- For mapping with the Azure AD app roles, an application role should be assigned to the user. Azure AD sends the role claim automatically with
http://schemas.microsoft.com/ws/2008/06/identity/claims/roleas a key.


Enabling and testing SAML authentication
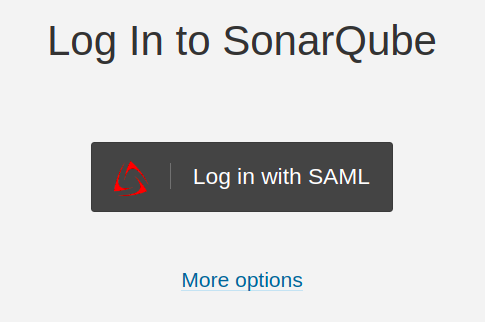
Step 1: In the SonarQube SAML settings, enable SAML.


Step 2: In the login form, the new button Log in with SAML (or a custom name specified in the sonar.auth.saml.providerName setting) allows users to connect with their SAML account.

Before enabling the SAML authentication on SonarQube, you can verify that the configuration is correct by clicking on Test Configuration. A SAML login will be initiated and useful information about the SAML response obtained from the Identity provider will be returned.
© 2008-2024 SonarSource SA. All rights reserved. SONAR, SONARSOURCE, SONARLINT, SONARQUBE, SONARCLOUD, and CLEAN AS YOU CODE are trademarks of SonarSource SA.