How to set up SCIM in Okta
SCIM provisioning is available starting in Enterprise Edition.
SCIM is a standard used to automate the exchange of user identity info between the identity provider and service provider. If you use Okta as an identity provider, you can enable SCIM to automate user provisioning and de-provisioning for SonarQube through Okta.
Once you enable SCIM in Okta, any user assigned to the SonarQube application in Okta is automatically provisioned in SonarQube. If a user gets unassigned from the SonarQube application or deactivated in Okta, the corresponding user account is automatically deactivated in SonarQube. However, if a user gets suspended in Okta, the corresponding user account remains unchanged in SonarQube.
Prerequisites
You’ve integrated Okta with SonarQube, as described on the How to setup Okta page.
Enabling SCIM in SonarQube
To enable SCIM provisioning in SonarQube, do one of the following:
- In your configuration file, set the
sonar.scim.enabledserver property totrue. - In the SonarQube UI, go to Administration > Configuration > General Settings > Authentication > SAML and activate the SCIM users (de)provisioning option.
Enabling SCIM in Okta
Step 1: From your Okta board, choose your SonarQube application > General > App Settings > Edit.
Step 2: Check Enable SCIM provisioning and click on Save. This will create a Provisioning tab.
Step 3: Choose the newly created Provisioning tab and click on Edit.

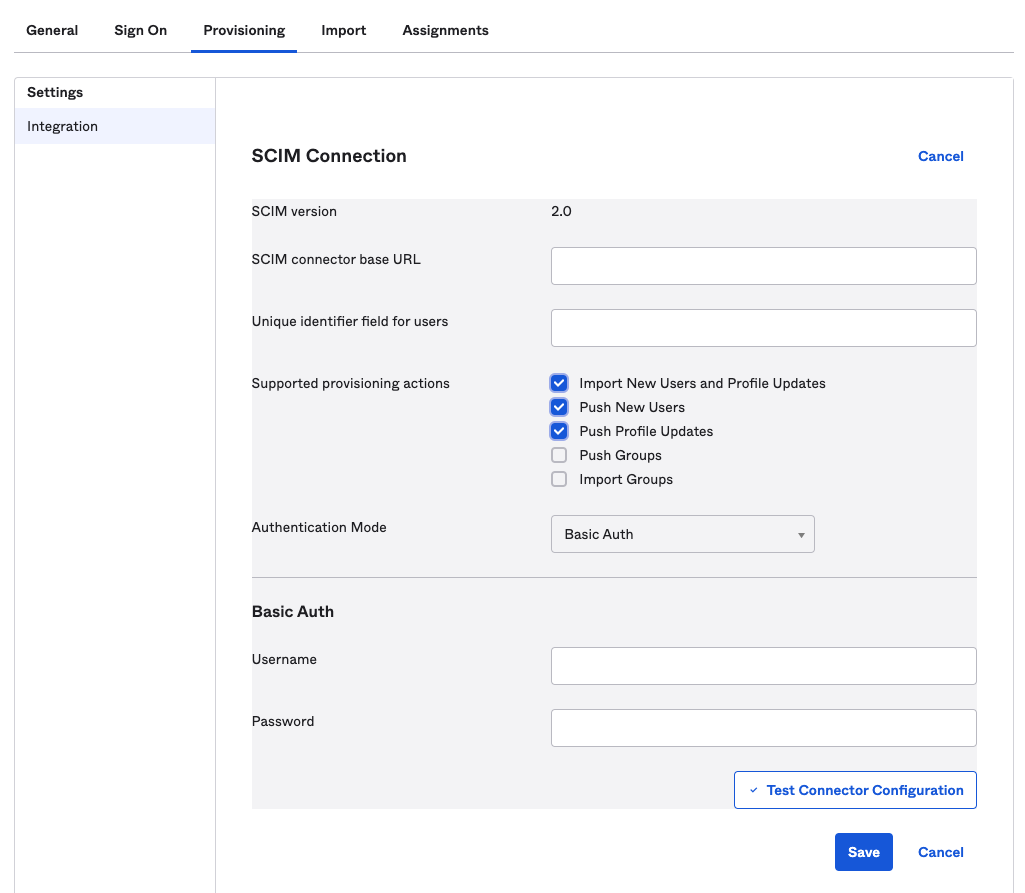
Step 4: Configure the SCIM Connection fields as follows:
- SCIM connector base URL:
<Your SonarQube URL>/api/scim/v2 - Unique identifier field for users:
userName - Supported provisioning actions: enable importing new users and profile updates, pushing new users, and pushing profile updates as shown in the above picture
- Authentication Mode: select Basic Auth
Step 5: In SonarQube, generate a user token for an admin account and copy the token into Okta’s Basic Auth > Username field.
Step 6: To check that the SCIM connection is valid, click on Test Connector Configuration. A green checkmark indicates that all the fields are properly filled.
Step 7: Click on Save.
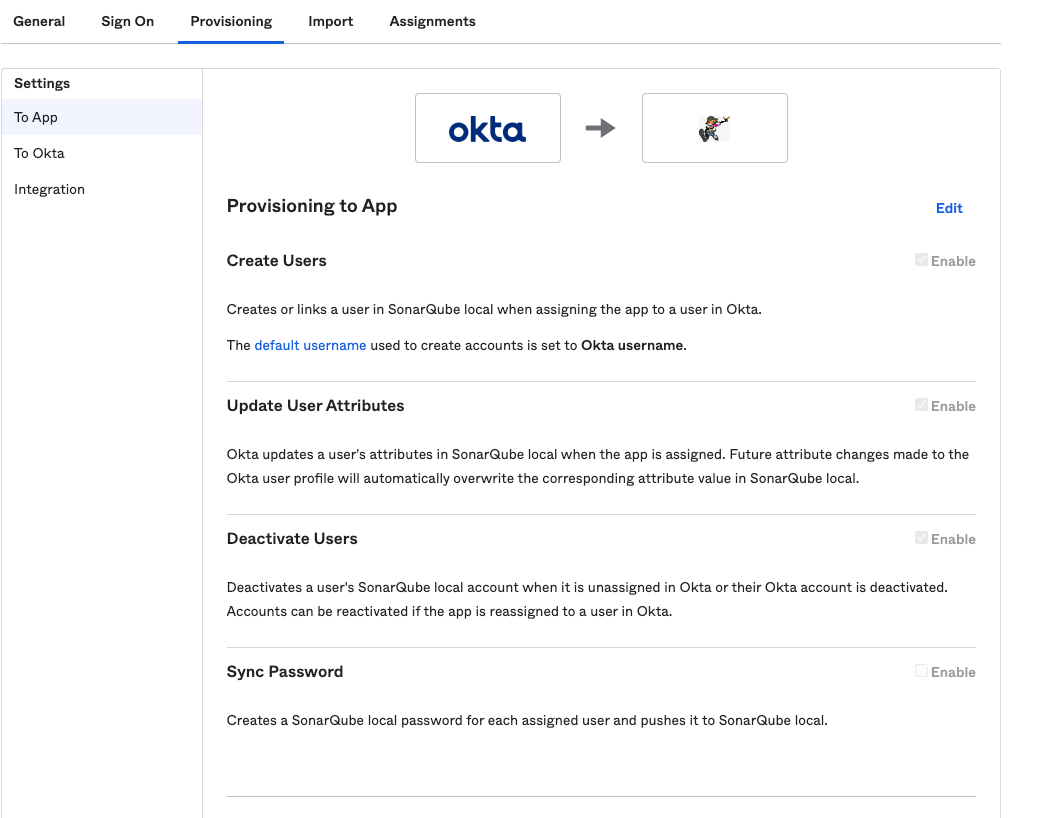
Step 8: In the next screen, click Edit and check the Create Users, Update User Attributes and Deactivate Users provisioning options.

Step 9: Click on Save.
Provisioning already assigned users
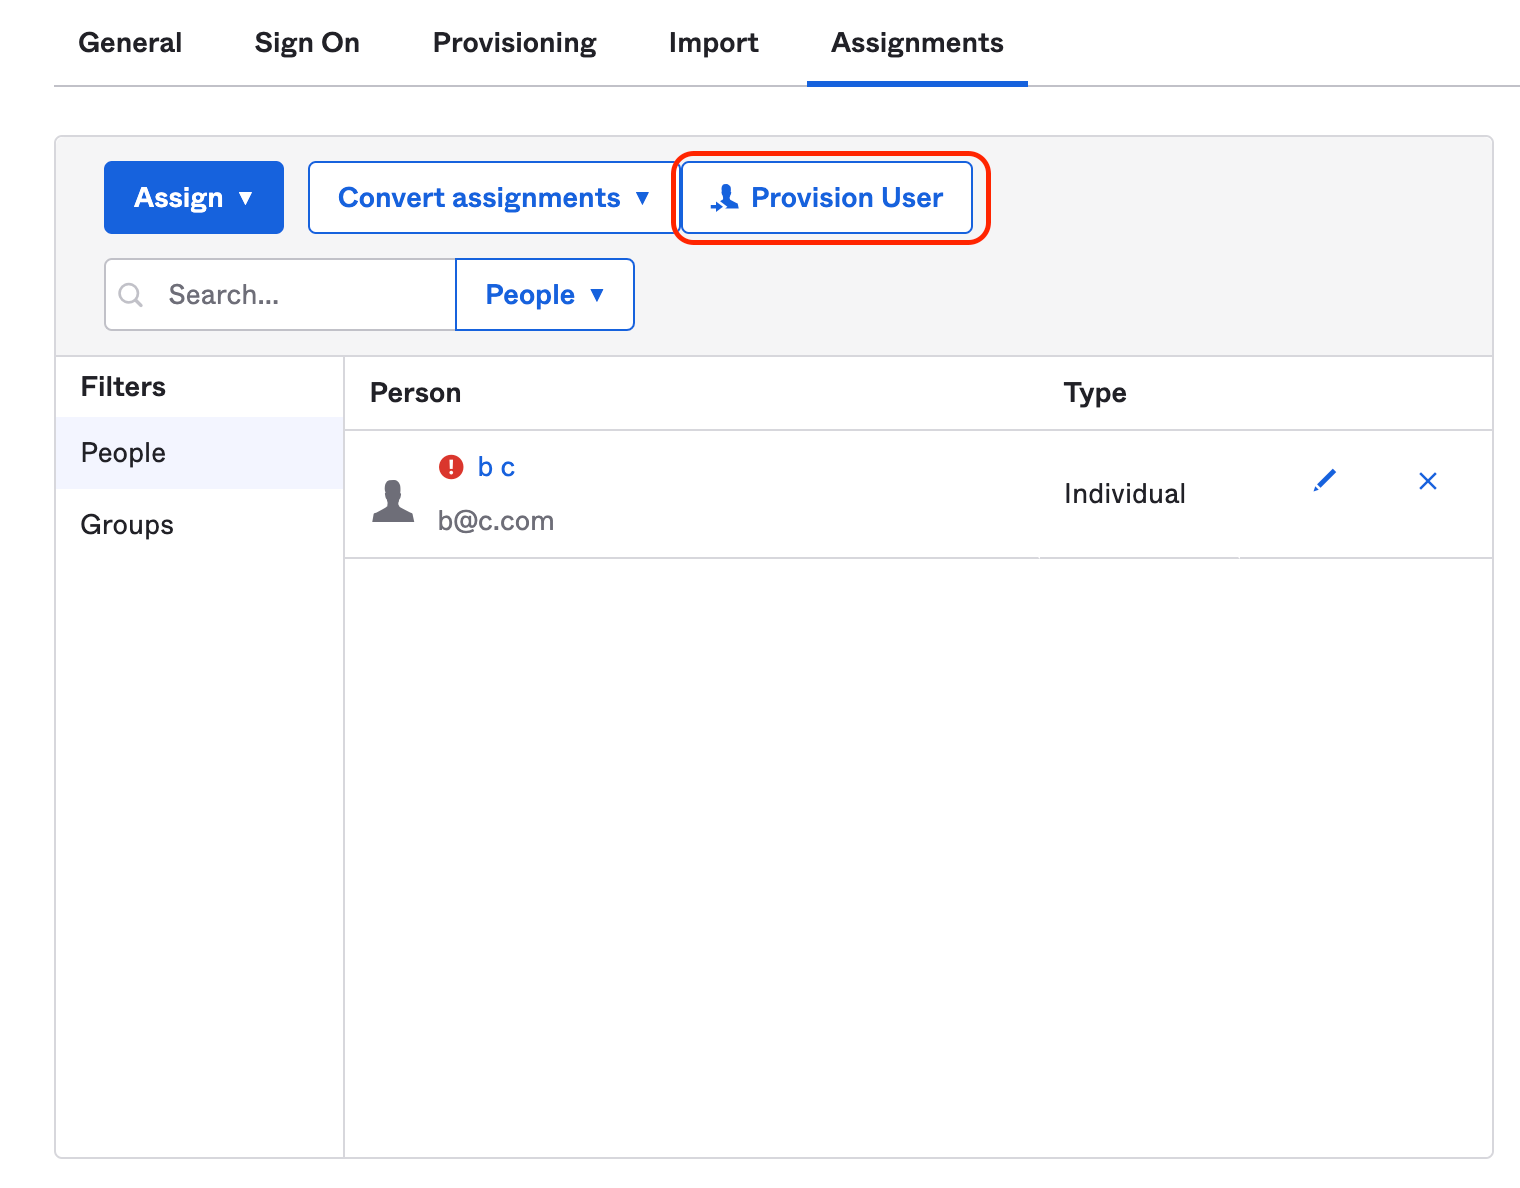
Users that are assigned before SCIM is enabled are not automatically provisioned. In the UI, an exclamation mark is displayed next to their names in the Assignments tab:

To force the provision of these users, click on Provision User. The exclamation mark should disappear, meaning that the users have been provisioned.