How to set up Keycloak
The following content may be useful if you're using Keycloak as a SAML identity provider.
To integrate Keycloak (the identity provider) with SonarQube (the service provider), both sides need to be configured.
Keycloak server configuration
Create a new SAML client
Step 1: Create your Client ID. Define it as something like sonarqube. It must not contain whitespace.
Step 2: Define your Client Protocol as saml.
Step 3: The Client SAML Endpoint can be left empty.
Configure the new SAML client
Step 1: Under Settings:
- Client Signature Required: ON (only if request signature is active in the SonarQube SAML configuration).
- Encrypt Assertions: ON (if the responses from the IdP are to be encrypted).
- Valid Redirect URLs:
<Your SonarQube URL>/oauth2/callback/saml. For example,https://sonarqube.mycompany.com/oauth2/callback/saml.
Step 2: Under Keys:
- Signing Key (optional): Add the service provider private key and the certificate if the signature of the requests is enabled on the SonarQube side (Keycloak generated keys can be used). This private key will have to be provided in PKCS8 format in SonarQube.
- Encryption Key (optional): Add the service provider certificate if you want to activate the encryption of Keycloak responses. If a request signature is used, you must use the same certificate for the encryption.
Step 3: In Client Scopes > Default Client Scopes, remove role_list from Assigned Default Client Scopes (to prevent the error com.onelogin.saml2.exception.ValidationError: Found an Attribute element with duplicated Name during authentication)
Step 4: Under Mappers, create a mapper for each user attribute:
- Create a mapper for the login:
- Name:
Login - Mapper Type: User property.
- Property:
Username(Note that this value should not contain any special characters other than.-_@, to meet SonarQube restrictions.) - SAML Attribute Name:
login
- Name:
- Create a mapper for the name:
- Name:
Name - Mapper Type: User property.
- Property:
Username(This can also be another attribute that you previously specified for the users.) - SAML Attribute Name:
name
- Name:
- (Optional) Create a mapper for the email:
- Name:
Email - Mapper Type: User property.
- Property:
Email - SAML Attribute Name:
email
- Name:
- (Optional) Create a mapper for the groups (if you rely on a list of roles defined in Roles of the realm, not in Roles of the client):
- Name:
Groups - Mapper Type: Role list.
- Role Attribute Name:
groups - Single Role Attribute: ON
- Name:
- If you rely on a list of groups defined in "Groups":
- Name:
Groups - Mapper Type: Group list.
- Role Attribute Name:
groups - Single Role Attribute: ON
- Full Group Path: OFF
- Name:
Step 5: In Realm Settings > General > Endpoints, click on SAML 2.0 Identify Provider Metadata to obtain the XML configuration file from Keycloak.
SonarQube configuration
Navigate to Administration > Authentication > SAML and click Create configuration, it will open a popup window with all the fields that you need to provide. For Azure AD, login to Azure and navigate to Azure AD.
Configure the SAML authentication: Administration > Configuration > General Settings > Authentication > SAML:
- Application ID: The value of the Client ID you set in Keycloak (for example,
sonarqube) - Provider ID: The value of the
EntityDescriptor > entityIDattribute in the XML configuration file (for example,http://keycloak:8080/auth/realms/sonarqube). - SAML login URL: The value of
SingleSignOnService > Locationattribute in the XML configuration file (for example,http://keycloak:8080/auth/realms/sonarqube/protocol/saml). - Identity provider certificate: The value you get from Realm Settings > Keys > RS256. Click on Certificate.
- SAML user login attribute:
login(or whatever you configured above when doing the mapping) - SAML user name attribute:
name(or whatever you configured above when doing the mapping) - (Optional) SAML user email attribute:
email(or whatever you configured above when doing the mapping) - Sign requests: Set to true to activate the signature of the SAML requests. It needs both the service provider private key and certificate to be set.
- Service provider private key: The service provider private key shared with the identity provider. This key is required for both request signature and response encryption, which can be activated individually. The key should be provided for SonarQube in PKCS8 format without password protection.
- Service provider certificate: The service provider certificate shared with the identity provider in order to activate the request signature.
You can find some instructions to convert different key formats here.
Enabling and testing SAML authentication
Step 1: Save the SAML configuration by clicking Save configuration.
Step 2: Before enabling the SAML authentication on SonarQube, you can verify that the configuration is correct by clicking Test Configuration. This will initiate a SAML login and return useful information about the SAML response obtained from the identity provider.
Step 3: Click Enable configuration.
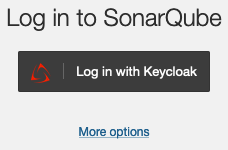
Step 4: In the login form, the new button Log in with Keycloak (or a custom name specified in the Provider Name field) allows users to connect with their SAML account.

Group synchronization
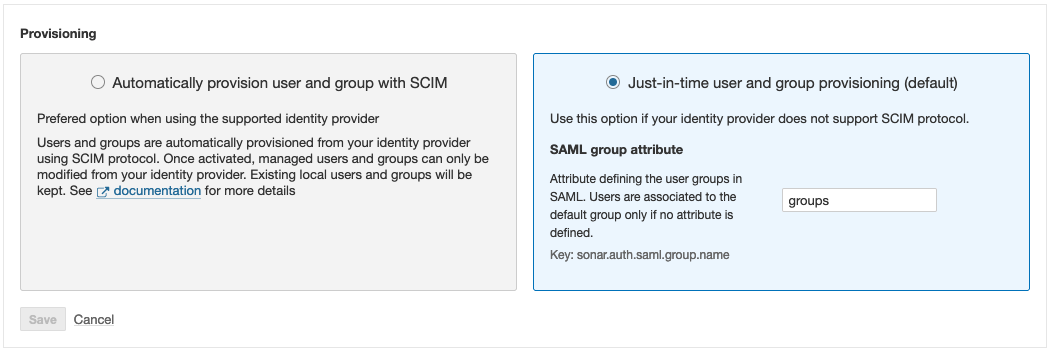
While configuring Keycloak, you configured a groups attribute (see the Keycloak server configuration section). You can now use it in SonarQube to enable group synchronization. To do this, under SAML > Provisioning, enter groups, or whatever name you gave to this attribute, in the SAML group attribute field. If no value is entered in this field, users are assigned to the default sonar-users group only.
Group synchronization is only compatible with the Just-in-Time user and group provisioning (default) option.

© 2008-2024 SonarSource SA. All rights reserved. SONAR, SONARSOURCE, SONARLINT, SONARQUBE, SONARCLOUD, and CLEAN AS YOU CODE are trademarks of SonarSource SA.