SCIM provisioning with Okta
Automatic provisioning through SCIM is available starting in Enterprise Edition.
You can enable SCIM to automate user and group provisioning from Okta to SonarQube. For an overall understanding of the feature, read the SCIM Overview page.
Prerequisites
You have a working SAML configuration.
Configuring SonarQube
To enable SCIM provisioning in SonarQube:
1. go to Administration > Authentication > SAML
2. Click Automatically provision user and group with SCIM under the Provisioning section. Click Save and validate the popup if you are sure you want to enable SCIM.
3. Click Save and validate the popup if you are sure you want to enable SCIM.
SCIM is now enabled in SonarQube, it will handle all queries coming from Okta about users and groups.
Configuring Okta
Step 1: From your Okta board, choose your SonarQube application > General > App Settings > Edit.
Step 2: Check Enable SCIM provisioning and click on Save. This will create a Provisioning tab.
Step 3: Choose the newly created Provisioning tab and click on Edit.

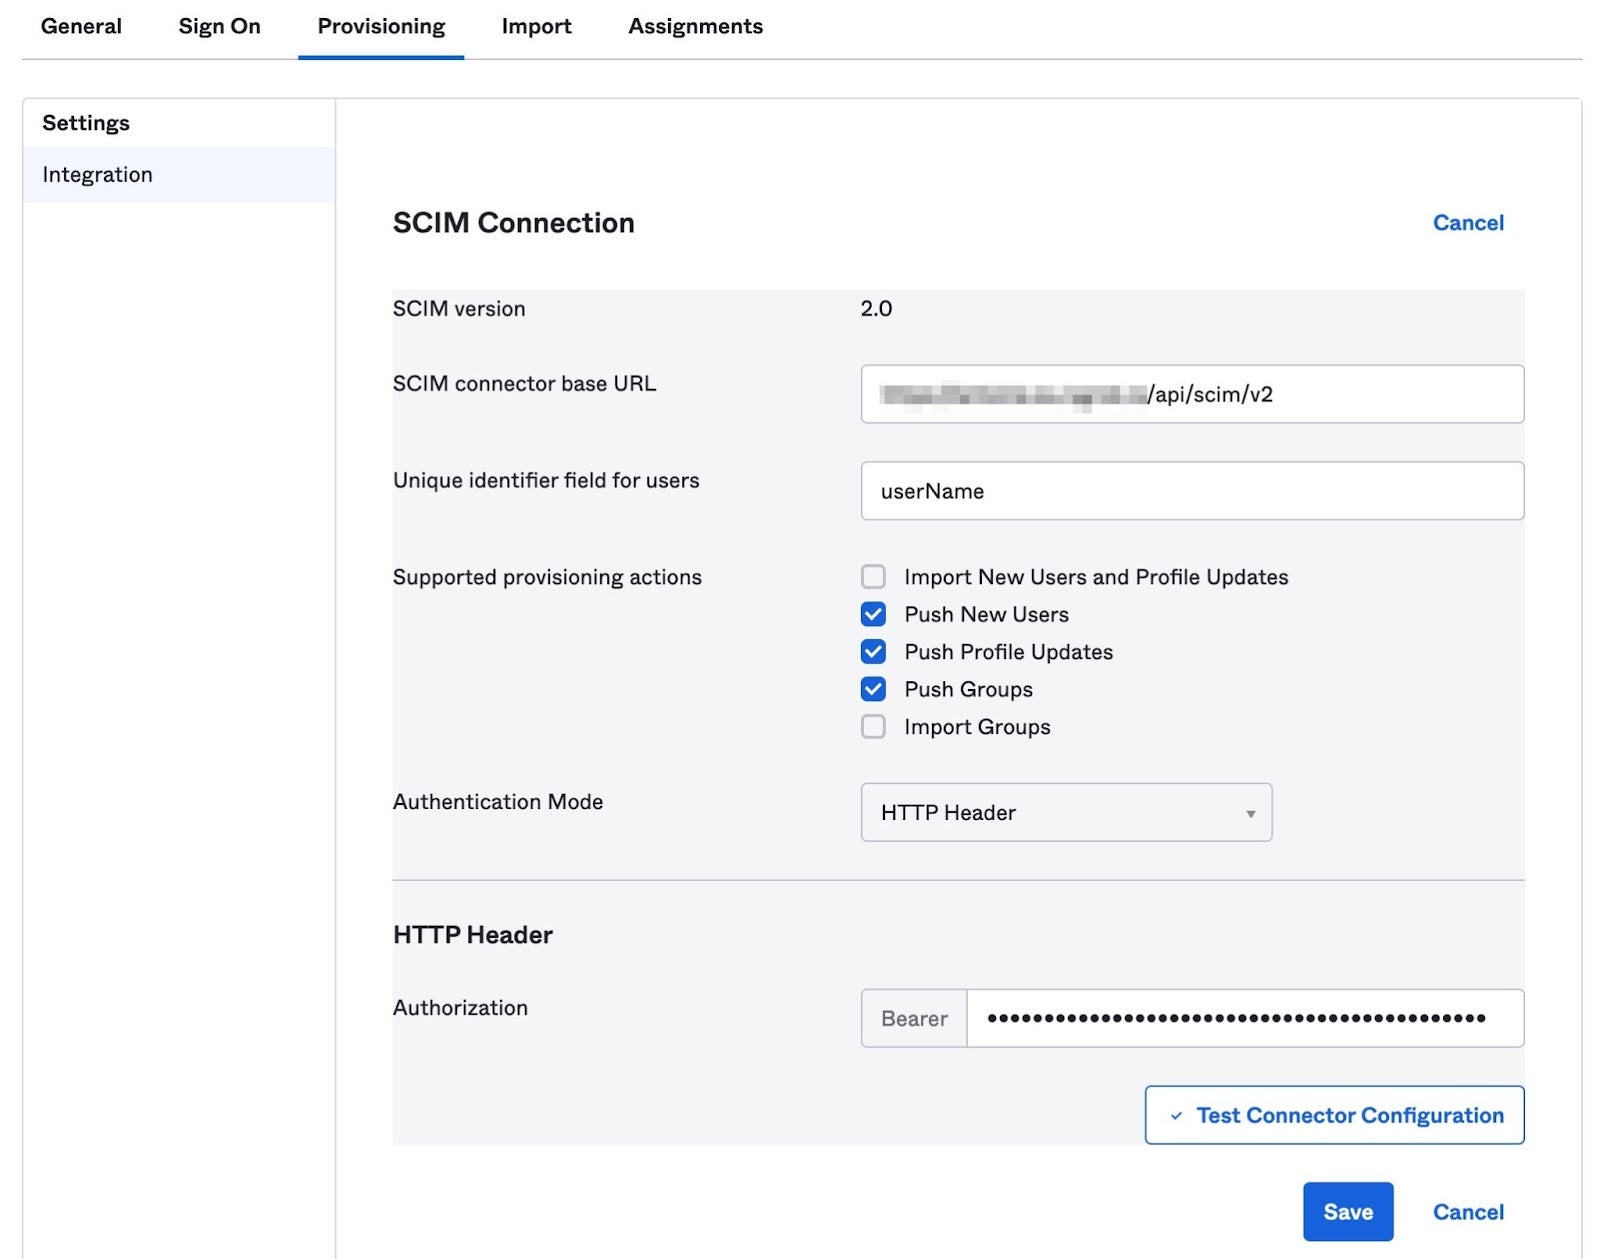
Step 4: Configure the SCIM Connection fields as follows:
- SCIM connector base URL:
<Your SonarQube URL>/api/scim/v2 - Unique identifier field for users:
userName - Supported provisioning actions: enable Push New Users, Push Profile Updates and Push Groups, as shown in the above picture
- Authentication Mode: select HTTP Header
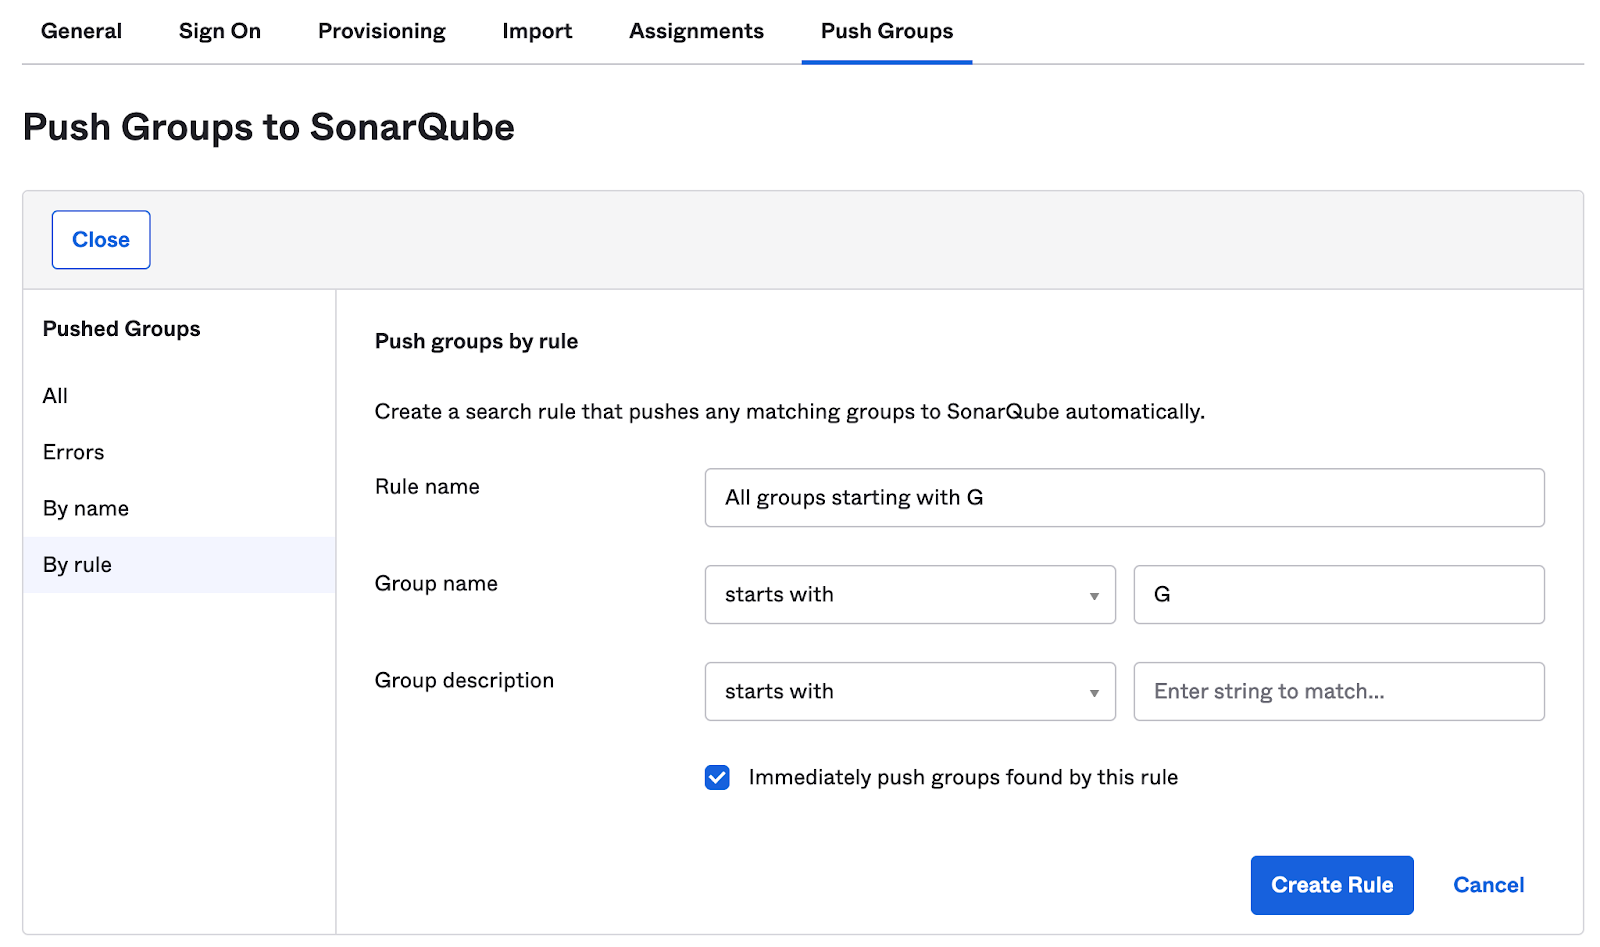
Step 5: Click Save. Under the Push Groups tab that appears, select the groups to provision to SonarQube. You have two options:
- select them by name, one by one, by clicking + Push Groups > Find groups by name.
- create a rule to match multiple groups at once. Click + Push Groups > Find groups by rule, give it the name and the criteria of your choice, then click Create rule. Note that Okta does not support regular expressions here and that matching groups are immediately provisioned when the rule is created.


Step 6: In SonarQube, generate a user token from an admin account and copy the token into Okta’s HTTP Header > Bearer field. We strongly advise that the admin account used is a local one (not SCIM managed) for safety reasons.
Step 7: To check that the SCIM connection is valid, click on Test Connector Configuration. A green checkmark indicates that all the fields are properly filled.
Step 8: Click Save.
Step 9: In the next screen, click Edit and check the Create Users, Update User Attributes and Deactivate Users provisioning options.

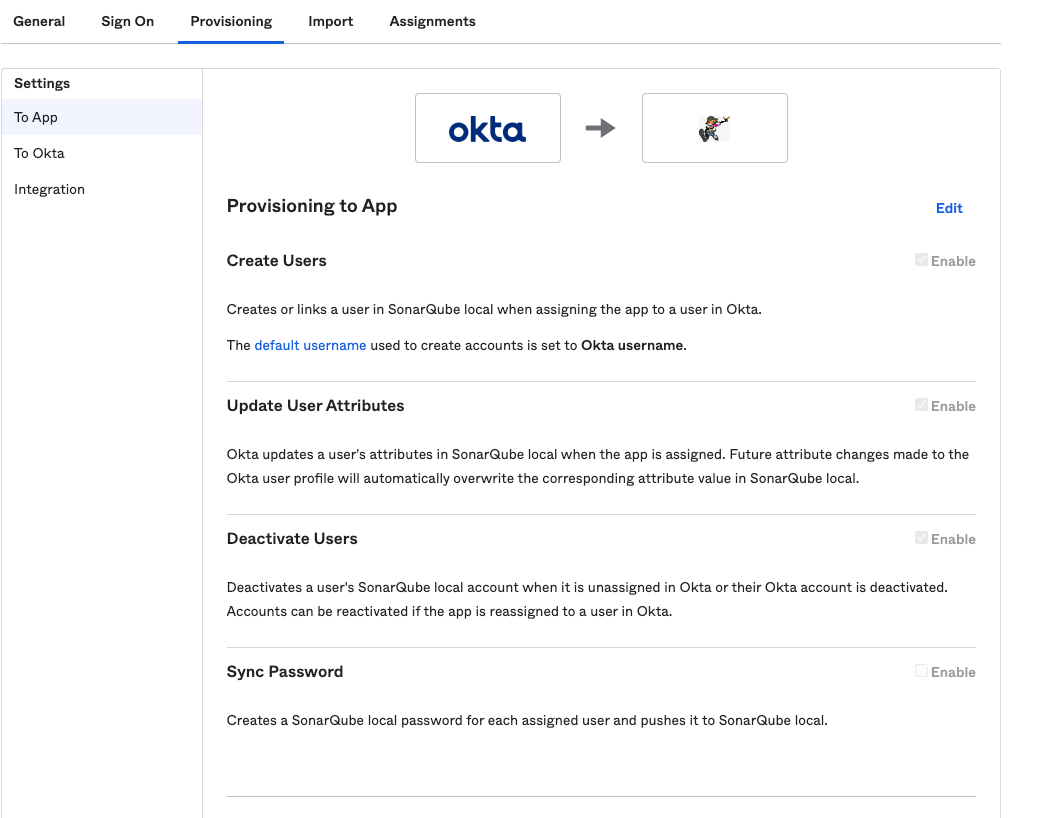
Step 10: Click Save. Okta users will be automatically provisioned with SonarQube.
Note that if a user gets suspended in Okta, the corresponding user account remains unchanged in SonarQube.
Provisioning already assigned users
Users that are assigned before SCIM is enabled are not automatically provisioned. In the UI, an exclamation mark is displayed next to their names in the Assignments tab:

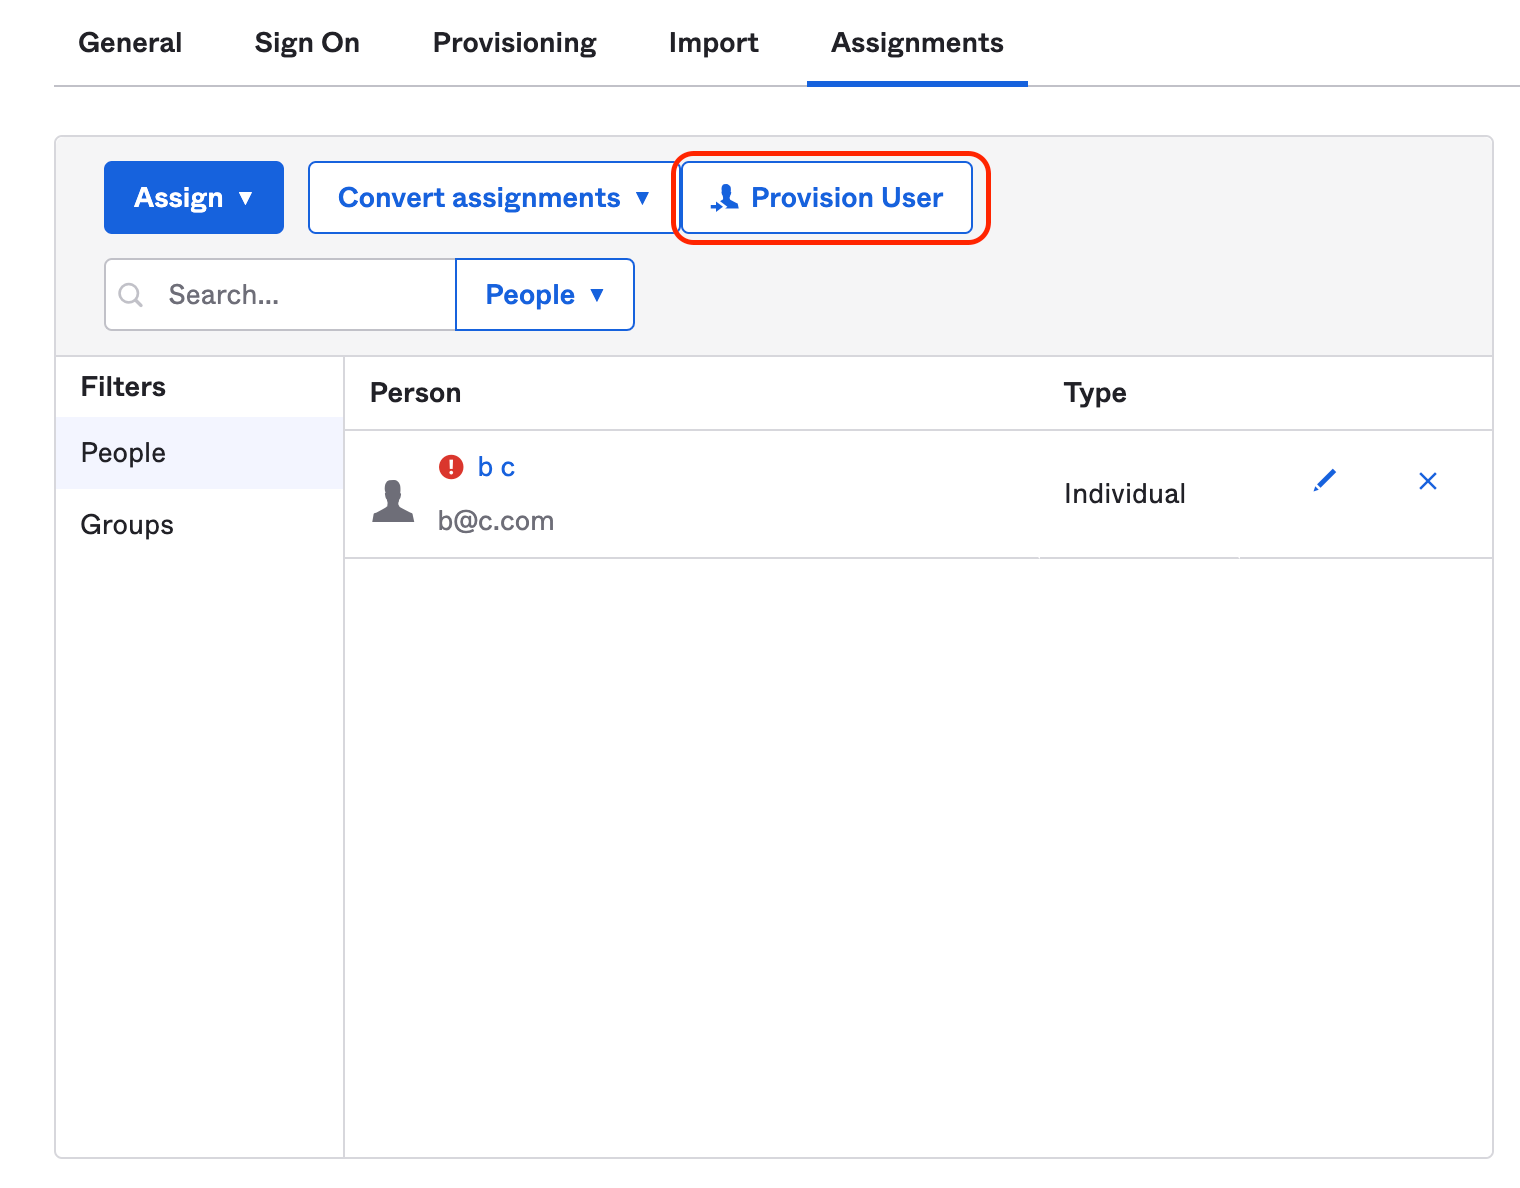
To force the provision of these users, click on Provision User. The exclamation mark should disappear, meaning that the users have been provisioned.
© 2008-2024 SonarSource SA. All rights reserved. SONAR, SONARSOURCE, SONARLINT, SONARQUBE, SONARCLOUD, and CLEAN AS YOU CODE are trademarks of SonarSource SA.